Learn OrthoVaultOS, one screen at a time.
Prefer to read? ↓Start here
This is the whole app on one screen. Hover any circle to find out what that button does, then pick a step above to be walked through it.
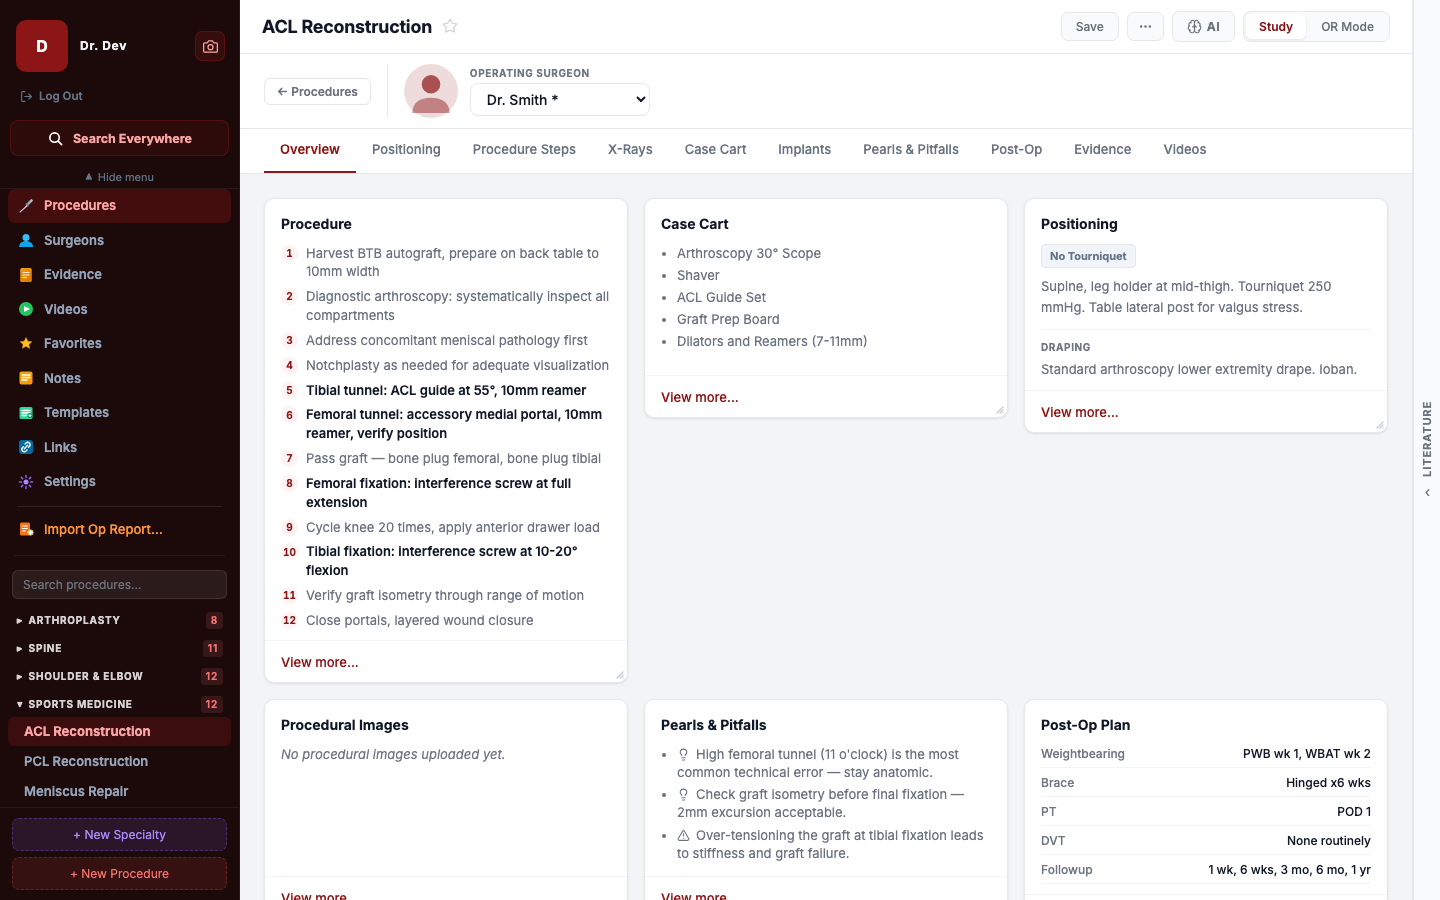
The written guide
Same material, nothing to click. The walkthrough above is for learning by doing; this is for looking something up. Expand any section.
OrthoVaultOS runs two ways from one account. The web app opens at orthovaultos.com/app in any browser with nothing to install. The desktop app for macOS and Windows is a download from the home page, and adds two things the browser cannot do: it keeps your library in a file on your own machine, and it works with no internet at all.
The desktop app is not registered with Apple or Microsoft yet, so the first launch shows a security warning — on macOS, right-click the app and choose Open; on Windows, click "More info" then "Run anyway". You only do this once; after that the app updates itself.
Create a free account and you are in. The free tier covers five surgeons and five procedures with no time limit, on both web and desktop, so you can try the full app across a real rotation before deciding anything.
Free ($0): five surgeons and five procedures, no time limit. The full app otherwise — surgeon preferences, procedure steps, evidence and implant references, cloud sync across your devices, and the AI assistant if you bring your own API key.
Essentials ($9.99/month): up to 10 surgeons and 20 procedures, operative report import, import and export of surgeon templates, favourites, and evidence and technique attachments.
Professional ($19.99/month): unlimited surgeons and procedures, plus phone photo upload and shared program workspaces.
Every plan includes both the web app and the desktop app. Subscriptions renew monthly until cancelled, and you can cancel any time from your Account page with no fee.
Build a specialty first, then the surgeon, then the procedure. Each has to exist before the next can be filed under it: a procedure is filed under a specialty, and the steps, case cart, implants and pearls you record are saved against whichever surgeon is selected at the time.
Create a specialty with "+ New Specialty" at the bottom of the sidebar. It will not appear as its own row on the Procedures page until it contains something, but it is immediately usable in the procedure form.
Some content is deliberately shared across every surgeon on a procedure rather than stored per-surgeon — evidence references, video links and uploaded media all carry a SHARED badge so you can tell at a glance.
If you already have a dictated operative note, "Import Op Report..." in the sidebar turns it into a filled-in procedure. Paste the text or upload a .txt, .pdf or .doc — nothing needs reformatting first. It is available from any screen, because you choose the procedure and surgeon inside the dialog.
It reads the note's own PROCEDURE and Primary Surgeon lines and matches them against your library, ignoring assistants so an assisting resident is not mistaken for the attending. When the diagnosis and the stated procedure disagree, the diagnosis is weighted first.
What it extracts: positioning and draping, numbered surgical steps, implants with sizes and counts (including K-wires and pins), the anaesthetic used, the post-op protocol, and numbered follow-up schedules.
Imported steps are added to whatever you had already written for that surgeon rather than replacing it, and every field stays editable — nothing is saved until you confirm.
The note is de-identified before it is stored: patient name, date of birth and MRN are stripped out for you.
Press ⌘K on macOS or Ctrl+K on Windows from anywhere to open Quick Search, then type across procedures, surgeons, steps and files.
Click the star on any procedure to pin it to Favorites.
The vertical LITERATURE tab on the right edge of every screen expands the Literature Search panel. It queries PubMed live and needs no API key or account.
On the Evidence tab, paste a PubMed, DOI or journal URL into the Auto-cite From URL box and the citation is fetched for you. You can also add references by hand or export the whole list as .bib.
From a Literature Search result, "+ Add to Evidence" files the paper into the open procedure in one click, carrying title, authors, journal, year, PubMed URL and abstract.
Highlights and notes you make on PDF and Word evidence files sync between your machines, not just the one you made them on.
The Videos tab takes both uploaded files (MP4, MOV, AVI, MKV) and pasted links — a YouTube watch URL or any direct video URL. Links are stored as links; nothing is downloaded.
On the X-Rays tab, attach an image to the pre-op, intra-op or post-op section, then open the X-ray Editor over it to draw, outline, add arrows and labels, and drag-place implant and clamp stamps. The source image is never modified.
If a file is too large or an upload cannot reach the cloud, the app now says so rather than leaving an entry that looks fine on the machine that created it.
Two AI features are optional and each needs your own key: Claude for the ✨ AI Assistant, and Gemini or Claude for the AI Summary in Literature Search. Both are entered in Settings → API Keys, and each has a Test Connection button so you find out immediately whether the key works.
The AI Assistant reads the procedure you have open, so questions do not need the case re-explained. It sits in a side panel rather than replacing the procedure view.
In the desktop app, API keys are stored in your OrthoVaultOS account rather than on one machine, so you enter a key once and it works on each of your computers. They are held in our database as plain text and are not encrypted at rest, so use a scoped key you can rotate. In the browser, keys are saved only in that browser and do not sync to or from your account. We use them for nothing but the requests you make, and usage is billed directly through your own Anthropic or Google account.
The app is fully usable with no keys at all — PubMed search, annotation, OR Mode, sync and everything else work without them.
OR Mode turns the procedure into a large-text checklist: tick steps as you go, watch the progress bar, and keep indications, positioning and draping one glance away.
Post-op items and TXA dosing can be toggled in real time from the same view.
After the case, log new pearls in the Pearls & Pitfalls tab and attribute them to the surgeon who taught them. They surface automatically next time that procedure is opened with that surgeon selected.
A program is a shared library for a whole residency, kept separate from your own. The switcher at the top of the sidebar names the vault you are currently in; open it to move between My Vault and any program you belong to, or to reach "Manage programs…". Shared programs require a Professional plan.
In the Shared Programs window, "Create" starts a program you own and "Join with a link" takes the invite a program owner sends you. Joining never merges anything — the program is added alongside your vault, and your vault is untouched.
While a program is selected, the procedures, surgeons, templates and notes in the sidebar are the program's. Adding a case works exactly as it does in your own vault, and there is no separate publish step — everyone in the program has it immediately.
Your personal vault stays private in both directions. Your API keys and your own case log are never written to a program, whichever vault you are working in.
A line beside each procedure title inside a program says who last edited it and when, covering real edits — steps, implants, case cart, surgeon preferences and images — rather than just renames. It shows nothing rather than guess when it cannot tell.
Two people can work on the same procedure at once. When someone starts editing a particular step, implant, case cart item, positioning, draping or imaging note, that one item locks for everyone else and shows who has it, while the rest of the procedure stays editable. A lock releases itself if that person closes the app or drops off the network.
A program is cached for reading offline so it is usable in the OR with no signal, but it cannot be edited offline — two people editing the same template with no connection would overwrite each other.
Signing in syncs your library across every device on the same account, on every plan, Free included: procedures, steps, surgeon preferences, implants, evidence and video links, notes, custom sections, uploaded media, OR session history and your theme.
In the desktop app, your AI API keys now travel with your account too, so a key pasted on one computer also works on your others. In the browser, keys stay in that browser. Per-device viewer settings stay on one machine. Settings → Cloud Sync lists exactly what does and does not travel.
On desktop your library lives in a file on your own machine, so the app opens and edits normally with no internet. Files and videos you attached are kept in cloud storage and need a connection to open. Changes queue and upload when you reconnect. If sync signs out, a banner tells you the app is not reaching the cloud rather than letting you assume it is.
Logging out of the website no longer signs you out of the desktop app.
The Templates page exports your whole library, or a single procedure for a single surgeon, as a portable .ovos file. Importing shows a preview of exactly what is inside before anything changes.
Surgeon profiles import and export separately, since they carry preferences rather than procedure data.
Settings → Appearance switches light and dark mode. Settings → Backup & Restore (desktop) saves a full snapshot on demand. Settings → Media Library gives a searchable view of every file you have uploaded, with storage usage, previews and rename/delete tools.